Unleash Shiny
R/Pharma - Advanced Shiny Workshop
David Granjon (Novartis) & John Coene (Opifex)
10-10-2021
About us
 David
David
Data Scientist at Novartis
@divadnojnarg
 John
John
Software Engineer at Opifex
@jdatap
Program
We're in for 2 hours of fun!
- Grab a ☕
- Make yourself comfortable 🛋 or 🧘
- Ask questions ❓
- Introduction 5 min
- Bundling with packer 15 min
- Project Setup 10 min
- Break 5 min
- Framework 7 60 min
- Break 5 min
- R model 10 min
- Echarts.js (Homework)
- Questions
Workshop Material
Clone this repository with the RStudio IDE or via the command line.
git clone https://github.com/RinteRface/unleash-shiny-2021.gitcd unleash-shiny-2021Then run renv::restore() to install the dependencies.
Importantly, this workshop makes heavy use of npm (Node's Package Manager), it comes with the installation of node.js:
- You can manually install node.js: nodejs.org/en/download/.
- You can also use package managers: nodejs.org/en/download/package-manager/.
Introduction
Intro
- Developing custom design for Shiny takes too much time ...
{shinyMobile}development>=2 years ...- What if you are already know a bit of HTML/CSS/JS?
- Relies on existing web templates to save time.
- Focus on app features.

Workshop objectives
- Setup rigorous R package structure for your app with {golem}.
- Learn how to use modern web stack tools like webpack to maintain your R/JS package with {packer}.
- Learn how R (server) and JS (client) communicate to exchange data.
- Learn modular JavaScript basics.
- Learn basics of JSX.
- Design awesome user interface with external template.

Managing JavaScript
Pre-processing JavaScript
Why?
What?
Browser Support
✅ R code written in 4.0.0 will (likely) run on 3.0.0+
💀 JavaScript not so much.
](assets/img/es6.png)
Code Size
Code size matters in JavaScript: the smaller the file the faster it loads.
Input
Can be written and read by a human.
function addOne(xyz){ return xyz + 1;}addOne(2);Minified
Loads faster but can't be written or read by a human.
function addOne(n){return n+1}addOne(2);Conclusion
We need to pre-process the code to:
- Minify it for performances
- Transpile to ensure it runs an (nearly) all browsers
- Be able to setup code management
It does not end here.
Pre-processing enables even more.
Dependency Management
No packages system with JavaScript but there is one for node.js---Node's Package Manager (NPM)---that can be used when preprocessing the code.
MANUAL
<script src="file1.js"></script><script src="file2.js"></script><script src="file3.js"></script>👎 Difficult to manage.
NPM
npm install dplyrthen
import { mutate } from 'dplyr';👍 Easy to manage.
Tree-shaking
Checking for dead variables.
Code checks
Discover errors when you write the code, not when you run it.
And so much more...
Downside
- There are a variety of tools to do the job (webpack, Grunt, Parcel, etc.)
- They are generally difficult to set up.
- They're not designed to work with R in mind.

Principles
Anything packer-related takes places in a 📦
Does not become a dependency to what you're building
It aspires to be a specialised {usethis}:
automate tasks when building packages with JavaScript.
Using packer
Set it up first.
- Create a package (or {golem} app)
- Scaffold
Then write some code and bundle with packer::bundle(),
which produces the JavaScript code.
Scaffolds?
Scaffolds are central to packer. They create the necessary structure to use webpack and npm with R.
- Golem - use packer with {golem}
- Htmlwidgets - use packer to create {htmlwidgets}
- Extensions - create shiny extensions (handlers)
- Inputs - create custom inputs
- Outputs - create custom outputs
- And a few more.
e.g.:
packer::scaffold_golem()The term "scaffold" was blatantly stolen from htmlwidgets::scaffoldWidget.
Bundle?
Source code is written in ./srcjs and is bundled to ./inst
packer::bundle()Project Setup
Intro
- Develop a simple app utilizing a cutting edge web template (Framework7).
- This app will consist in:
- A JS powered select input controlling a variable.
- A visualization powered by
{ggplot2} - Homework: replace
{ggplot2}by JS driven visualization.

Scaffold Framework7 🚀🚀🚀
We call:
packer::scaffold_golem(framework7 = TRUE)Sets a Framework7 compatible structure for {golem}:
- Install npm dependencies.
- JS assets folder
./srcjs. - Loaders for CSS, JS, JSX ...
- Config for webpack.
- So that you don't have to worry too much.

Test it 🥼
This is a very basic app but it works well.
packer::bundle()pkgload::load_all()run_app()Bad news ... it is time for the ...
Break!
See you in 5 minutes.
Framework 7
Intro
- First class mobile template for the web.
- Native look and feel for iOS and Android
- Progressive web app (PWA) support.
- ... also works for desktop apps 😏

Import Framework7 and CSS 👩🏫
Inside the main ./srcjs/index.js.
- Notice how CSS is imported.
- Requires style/css loaders.
- Modular approach: import only what is required.
- Lighter JS bundle.
- Faster app.
// Import Framework7import Framework7 from 'framework7';// Import Framework7 Stylesimport 'framework7/framework7-bundle.min.css';Layout basics 👩🏫
This part is handled by app_ui.R.
Framework7 requires an index.html script:
<div id="app"></div>is the app root required for initialization.index.jsthe script generated with{packer}after bundling.golem_add_external_resources()fills the<!-- Head content ... -->.
<!DOCTYPE html><html> <head> <!-- Head content ... --> </head> <body> <!-- App root element ... --> <div id="app"></div> <!-- Path to Framework7 JS--> <script type="text/javascript" src="www/index.js"></script> </body></html>App template 👩🏫
The simplest Framework7 layout is composed of:
- The app wrapper with unique id required for initialization.
- A single auto-initialized view.
- A page with:
- navbar (top).
- toolbar (bottom).
- page content (middle).
<div id="app"> <div class="view view-main view-init safe-areas"> <div class="page"> <!-- navbar --> <!-- toolbar --> <div class="page-content"></div> </div> </div></div>HTML + JS: welcome JSX 👩🏫
Combine HTML and JavaScript code in the same file.
Without JSX
<template> <div class="title" innerHTML=${title}></div></template><script> export default (props) => { const title = 'Hello World'; return $render; }</script>👎 Difficult to manage.
With JSX
export default () => { const title = 'Hello World'; return () => ( <div class="title">{title}</div> )}👍 easy to manage.
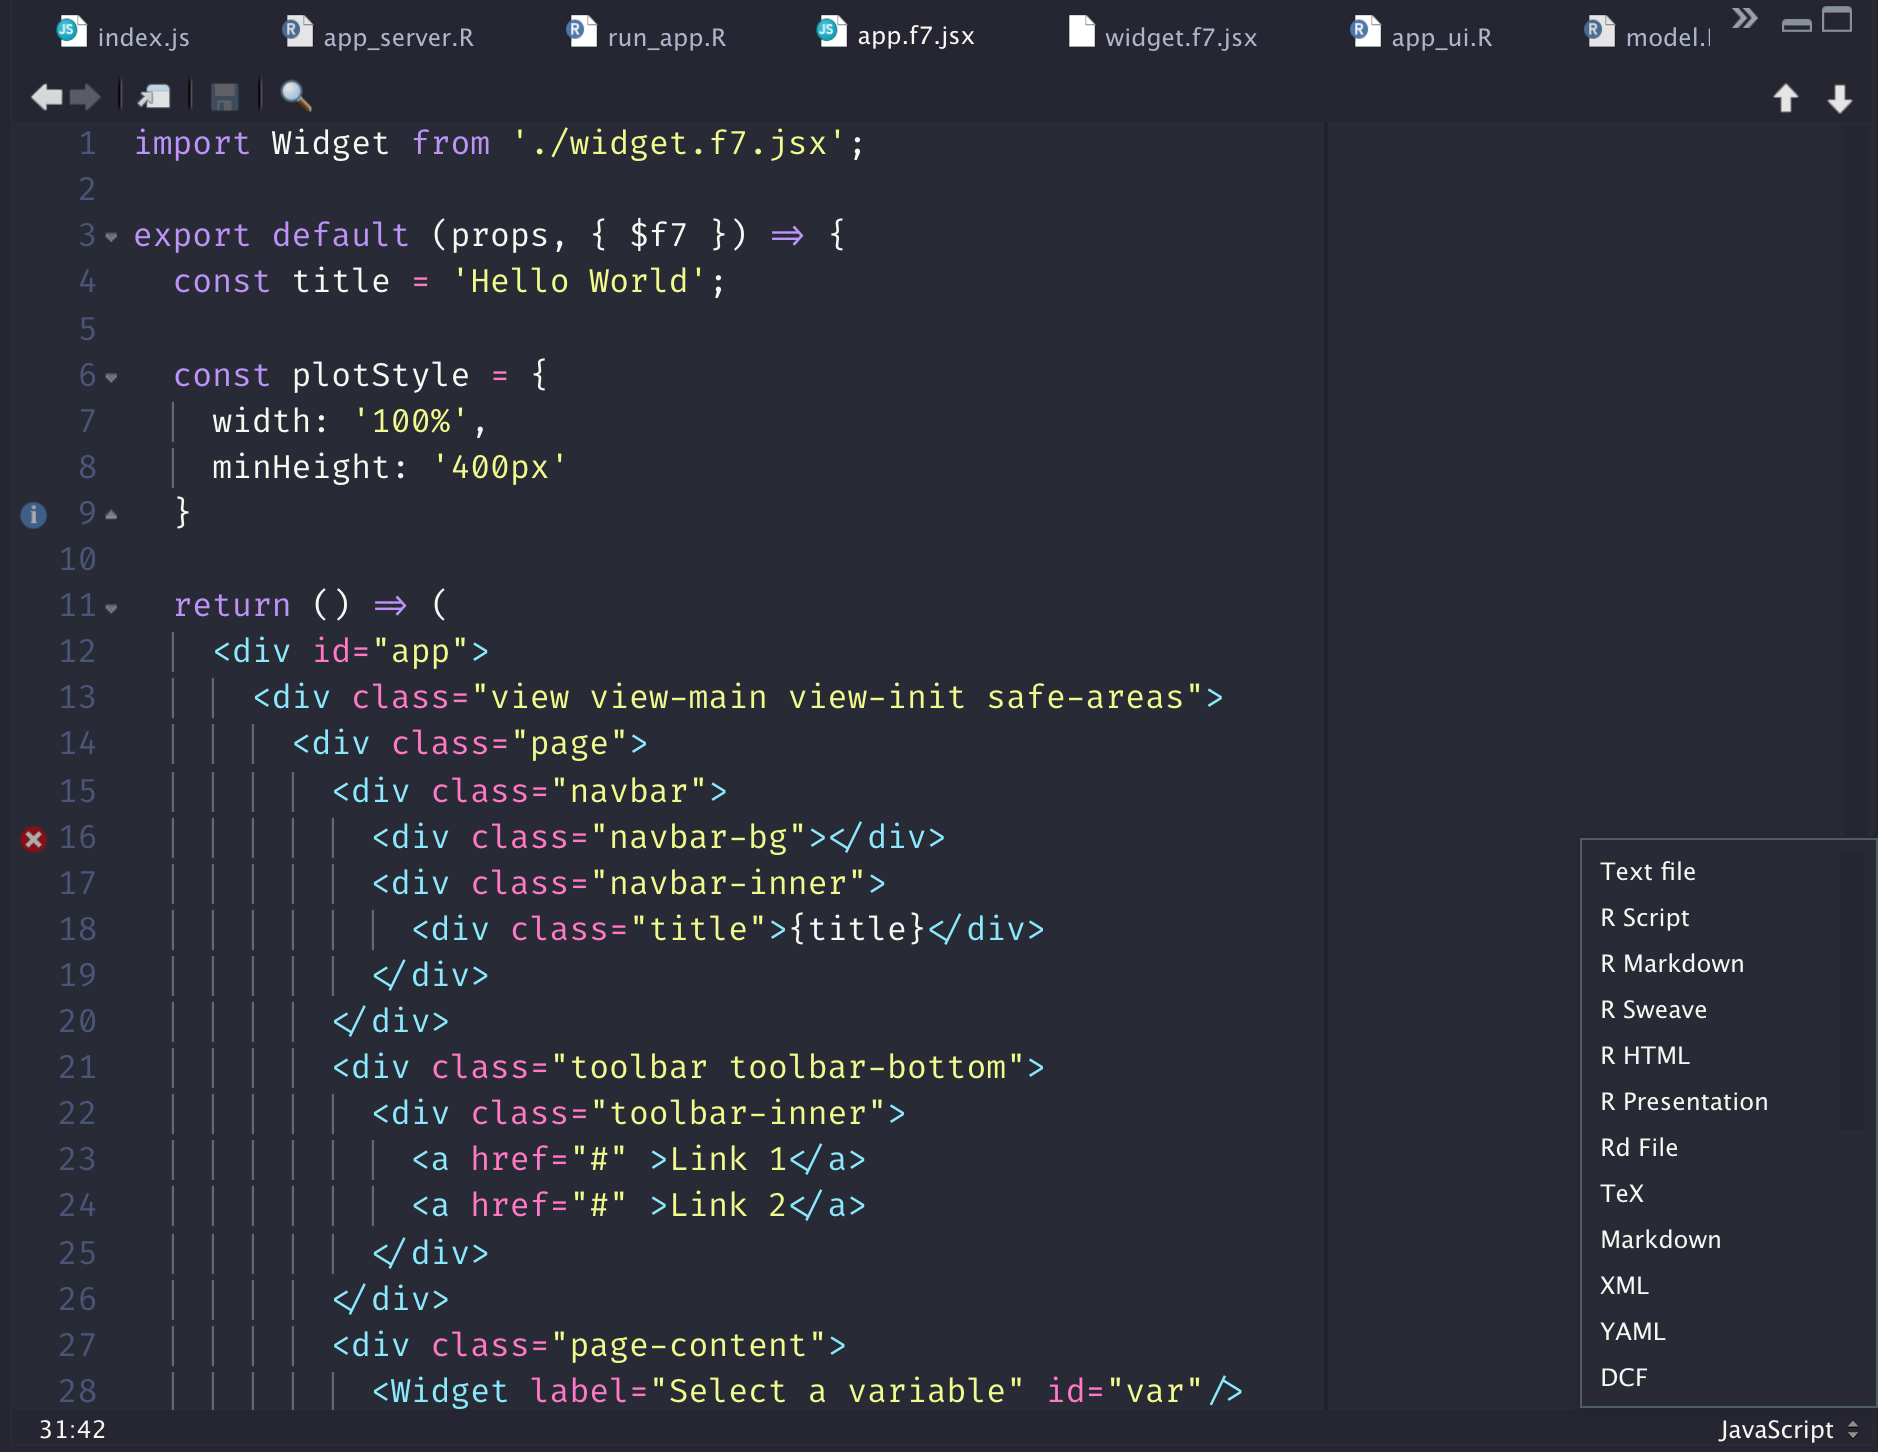
JSX in RStudio ⚠️
- RStudio is not a web development oriented IDE.
- JSX appears as text file.
- You may change it to JavaScript.
About Framework7 components 👩🏫
- Components have 2 default parameters:
- props gather all passed attributes.
- context provides access to:
- The app instance
$f7. - More here.
- Components:
- must return a render function.
- can be self-closed.
<Component user="David" id="compo"/>const Component = (props, context) { const greetings = 'Hello ' + props.user; // render function return () => ( <h1>{greetings}</h1> )}Main app component 👩🏫
{packer} created app.f7.jsx.
export default (props, { $f7 }) => { const title = 'Hello World'; return () => ( <div id="app"> <div class="view view-main view-init safe-areas"> <div class="page"> <!-- navbar ... --> <!-- toolbar ... --> <div class="page-content"> <div class="block strong"> Page Content </div> </div> </div> </div> </div> )}Initialize App instance 👩🏫
The remaining of ./srcjs/index.js:
- Initializes the app instance:
- Targets app id.
- Sets custom theme.
- Plugs the App component in the component slot.
- Many other options available ...
// ... Other imports ...import App from './components/app.f7.jsx';let app = new Framework7({ el: '#app', theme: 'ios', // specify main app component component: App});About the Framework7 smartSelect 👩🏫
It's time to add an extra component.
- Improved
selectInput(). - Triggered by
aelement. selectcontains multipleoptiontags.selectis followed by a label tag.
<div class="list"> <ul> <!-- Smart select item --> <li> <!-- Additional "smart-select" class --> <a href="#" class="item-link smart-select"> <!-- select --> <select name="fruits"> <option value="apple" selected>Apple</option> ... </select> <!-- Select label --> </a> </li> </ul></div>Widget element (1/6): your turn 🥼
- Open
./srcjs/index.js. - Between CSS import and the app initialization, add the following code.
- We also import
Sheetsince smartSelect needs it to open.
// ./srcjs/index.js// Install F7 Components using .use() method on class:import Sheet from 'framework7/esm/components/sheet/sheet.js';import smartSelect from 'framework7/esm/components/smart-select/smart-select.js';Framework7.use([Sheet, smartSelect]);Widget element (2/6): your turn 🥼
- Create a new
./srcjs/components/widget.f7.jsxcomponent. - Copy the preliminary code.
- Replace ID and LABEL by the relevant props elements.
- Don't change
data-open-in="sheet".
// ./srcjs/components/widget.f7.jsxexport default (props, { $f7 }) => { return () => ( <div class="list"> <ul> <li> <a class="item-link smart-select smart-select-init" id=ID data-open-in="sheet"> <select name=ID> </select> <div class="item-content"> <div class="item-inner"> <div class="item-title">LABEL</div> </div> </div> </a> </li> </ul> </div> )}Widget element (3/6): your turn 🥼
- Import the widget in the main app component.
- Don't forget that
widget.f7.jsxandapp.f7.jsxare in the same folder. - Fill in the
___.
// ./srcjs/components/app.f7.jsximport ___ from '___';export default (props, { $f7 }) => { // code omitted ... return () => ( <div id="app"> ... </div> )}Widget element (4/6): your turn 🥼
Let's add some <option> to the <select> tag...
- Create select options:
- Create a
namesarray containingwt,hpandqsecstrings. - Map over each array element to build an
<option>array.
- Create a
- Update render function:
- Add the newly created elements to
<select>.
- Add the newly created elements to
Fill in the ___.
// ./srcjs/components/widget.f7.jsxexport default (props, { $f7 }) => { // (1) const names = [___]; const selectOptions = ___.map( (name) => { let isSelected = name === 'wt'? true: false; return( <option key={___} value={___} selected={___}> {___} </option> ); } ) // (2) return () => ( // other tags are not shown <select name=ID> {___} </select> )}Widget element (5/6): your turn 🥼
Let's send the selected value to Shiny (1/2).
- Create
getSelectValue:- Give it an id parameter.
- Smart select instance is recovered with
$f7.smartSelect.get()method. - Smart select value obtained with
instance.getValue(). - Call the relevant Shiny JS method to set the input value.
// ./srcjs/components/widget.f7.jsxexport default (props, { $f7 }) => { // ... code from previous step ... // Recover select value const getSelectValue = (id) => { let select = $f7.smartSelect.get('#' + ___); Shiny.___(___, select.getValue()); }; // render function return () => (...)}Widget element (6/6): your turn 🥼
Let's send the selected value to Shiny (2/2).
- In the component render function:
- Add an
onChangeprop to the<a>element. onChangetriggered each time a new value is selected.- Inside
onChange, callgetSelectValuewith relevant ID parameter. - Sends it to Shiny with
Shiny.setInputValue.
- Add an
// ./srcjs/components/widget.f7.jsxexport default (props, { $f7 }) => { // ... code from previous step ... // render function return () => ( // Other tags are not shown <a class="item-link smart-select smart-select-init" onChange={() => ___(ID)} id=ID data-open-in="sheet"> ... // ommitted since unchanged </a> )}Test it 🥼
- Open
./R/app_server.R. - Add this code, replacing ID by what you chose JS side.
- Input does not have initial value...
# Inside ./R/app_server.RobserveEvent(input$<ID>, { message(sprintf("Slider value: %s", input$<ID>))})packer::bundle()pkgload::load_all()run_app()Test it 🥼
packer::bundle()pkgload::load_all()run_app()🏆 Congrats! You designed your first component. Let's improve it by adding some R logic.
Break!
See you in 5 minutes.
R Model
Intro
- Simple regression model with the
mtcarsdataset and{ggplot2}. - One variable is selected from JS with newly designed custom widget.
- Formula
lm(mpg ~ input$var, mtcars).
R business logic: your turn 🥼
- Open
./R/app_server.R. - Fill in the
___and....
output$plot <- renderPlot({ ggplot( data = ___, mapping = aes(x = mpg, y = .data[[___]]) ) + geom_...() + geom_smooth()})That's all folks!
Insert the plot 🥼
output$plotworks by pair withrenderPlot("plot")...- but ... we can't insert the plot as R code inside
app_ui.R. - Don't forget that Shiny is just creating HTML from R.
In the R console, run:
plotOutput("plot")which yields:
<div id="id" class="shiny-plot-output" style="width:100%;height:400px;"></div>Insert this in ./srcjs/components/app.f7.jsx.
Improve the design 🥼
- Explore the Framework7 card container documentation.
- Include the previous plot in the container of your choice.
- Recompile the JS code and run the app.

Homework: Echarts.js
Intro
- Replace the previous
{ggplot2}chart by JS code. - We'll have to send data from R to JS.
Communication done through the websocket.
R side:
sendCustomMessagesends R messages to JS.
JS side:
Shiny.addCustomMessageHandlerreceives message fromsession$sendCustomMessage. Both are linked by the type parameter

echarts assets
- Install echarts and echarts-gl.
- Import JS assets in
./srcjs/components/widget.f7.jsx. - Review the echarts documentation.
packer::npm_install( c( "echarts", "echarts-gl" ), scope = "prod")// Import plotting libraryimport * as echarts from 'echarts';import 'echarts-gl';echarts plotting strategy
- Create a DOM container for the plot.
- Initialize the plot container.
- Set plot options.
- Update plot instance.
<div id="plot" style="width:100%; min-height:400px;"></div>let chart = echarts.init(document.getElementById('plot'));myChartOptions = { title: { text: 'Plot title' }, legend: { data:[...] }, xAxis: { data: ...}, yAxis: { type: ... }, series: [ { name: ..., type: ..., data: ... }, // other data ]};myChart.setOption(myChartOptions);Process R data
- Create a new
./R/process.Rscript. process_data()selects the relevant column based on a given parameter.- Fill in the
___.
process_data <- function(parm, session = shiny::getDefaultReactiveDomain()) { data_subset <- list(mtcars$mpg, mtcars[[___]]) names(data_subset) <- c("mpg", parm) processed_data <- list( data = ___, var = ___ ) session$sendCustomMessage("model_data", ___)}Add Shiny
- In
./R/app_server.R, add anobserveEvent()to triggerprocess_data()based on the select input value (JS side). - Comment out the old
{ggplot2}code. - In
./srcjs/components/app.f7.jx, remove theshiny-plot-outputclass from the plot container.
observeEvent(___, { ___(___)})Recover R data (1/4)
- Inside
./srcjs/components/widget.f7.jsxcreate a newrenderPlotfunction, right after the widget component.
// ./srcjs/components/widget.f7.jsxexport default (props, { $f7 }) => { // ... renderPlot(); return () => (...)}const renderPlot = () => { // JS logic}Recover R data (2/4)
- Inside
renderPlotfunction:- Add
shiny:connectedevent listener. - Initialize the echarts plot instance.
- Copy and paste the resize event to handle plot resize.
- Add
// ./srcjs/components/widget.f7.jsxlet plot;$(document).on('shiny:connected', () => { // prepare echarts plot plot = echarts.___(document.getElementById(___));});// Resize event$(window).on('resize', function() { plot.resize();});Recover R data (3/4)
- Add
Shiny.addCustomMessageHandlerto capture the message sent from R. - A R list translates into a JS object.
- Fill in the
___.
//./srcjs/components/widget.f7.jsxlet plotOptions, p, data;Shiny.addCustomMessageHandler(___, (___) => { p = message.var; data = message.___;});Recover R data (4/4)
- In the same message handler, set plot options.
- Apply options to the plot instance.
- Fill in the
___.
// ./srcjs/components/widget.f7.jsxplotOptions = { title: { text: 'Plot' }, tooltip: {}, legend: { data:['mpg', p] }, xAxis: { data: message.data[___] }, yAxis: { type: 'value' }, series: [ { name: p, type: 'scatter', data: message.data[___] } ]}___.setOption(___);